Have you ever wanted to transform into a mystical woodland creature or add a touch of whimsy to your cosplay ensemble? Look no further! Creating DIY deer ears is an exciting and cost-effective way to elevate your costume game. Whether you're attending a themed party, participating in a cosplay event, or simply seeking a fun craft project, making your own deer ears can be both rewarding and enjoyable. This comprehensive guide will walk you through every step of the process, ensuring you achieve professional-looking results without breaking the bank.
DIY projects have become increasingly popular as people seek creative ways to express themselves and personalize their costumes. Deer ears, in particular, have gained immense popularity due to their versatility and charm. They can complement a variety of outfits, from fairy tale-inspired looks to modern anime characters. By learning how to create DIY deer ears, you'll not only save money but also gain a sense of accomplishment knowing that your accessory is entirely handmade.
This article is designed to provide you with all the information you need to successfully craft your own deer ears. From selecting the right materials to troubleshooting common issues, we've got you covered. With our step-by-step instructions, even beginners can achieve stunning results. So, gather your supplies, roll up your sleeves, and let's dive into the world of DIY deer ears!
Read also:Unveiling The Truth About Videos Gore A Deep Dive Into The World Of Shocking Content
Table of Contents
- Why Choose DIY Deer Ears Over Store-Bought Options?
- What Materials Do You Need to Create DIY Deer Ears?
- How to Get Started: Preparing Your Workspace
- Step-by-Step Guide to Creating DIY Deer Ears
- How Can You Customize Deer Ears for Different Looks?
- Common Mistakes to Avoid When Making DIY Deer Ears
- What Are the Best Tips for Beginners?
- FAQs About DIY Deer Ears
- Conclusion
Why Choose DIY Deer Ears Over Store-Bought Options?
When it comes to accessorizing your cosplay or party outfit, store-bought deer ears might seem like a convenient option. However, creating your own deer ears offers numerous advantages that make the extra effort worthwhile. For starters, DIY projects allow you to tailor the design to your exact preferences. You can choose the color, texture, and size of the ears to ensure they perfectly match your costume. Additionally, making your own deer ears can be significantly more affordable than purchasing high-quality ones from a store.
Another compelling reason to opt for DIY deer ears is the sense of pride and satisfaction that comes with crafting something yourself. It's a great way to showcase your creativity and uniqueness. Moreover, by creating your own accessories, you contribute to reducing waste and supporting sustainable practices. Many store-bought accessories are made using non-recyclable materials, whereas DIY projects often utilize eco-friendly alternatives. Lastly, learning how to create DIY deer ears is a fun and engaging activity that can be enjoyed solo or with friends and family.
What Materials Do You Need to Create DIY Deer Ears?
Gathering the right materials is crucial for a successful DIY deer ears project. While the specific items you'll need may vary depending on the design you choose, some essential supplies include:
- Foam sheets or thick felt for shaping the ear pieces
- A headband or wig cap as the base structure
- Fabric of your choice for covering the ears
- Hot glue gun and glue sticks for securing the components
- Scissors or an exacto knife for cutting materials
- Embroidery thread or fabric glue for detailing
- Decorative elements such as ribbons, beads, or faux fur
When selecting materials, consider the durability and comfort of the final product. Ensure that the fabric you choose is soft enough to rest against your head without causing irritation. Similarly, opt for lightweight foam or felt to prevent the ears from feeling too heavy. Investing in quality tools will also make the crafting process smoother and more efficient.
How to Get Started: Preparing Your Workspace
Before diving into the creation process, it's important to set up a proper workspace. Clear a flat surface where you can spread out your materials and tools without clutter. Cover the area with a protective layer, such as a plastic sheet or old newspaper, to prevent damage from glue or paint. Ensure that your workspace is well-lit and ventilated, especially if you plan to use adhesives or other potentially messy supplies.
Organize your materials in a logical manner to streamline the crafting process. Keep frequently used tools, such as scissors and glue, within easy reach. If you're working with delicate fabrics or foam, handle them carefully to avoid tearing or damaging the pieces. Taking a few moments to prepare your workspace will save time and frustration later on, allowing you to focus on creating beautiful deer ears.
Read also:3964033391205812156665306296942019526085264122614430011300281239836637123672338422312
Step-by-Step Guide to Creating DIY Deer Ears
Now that you have your materials and workspace ready, it's time to dive into the step-by-step process of creating DIY deer ears. Follow these instructions carefully to achieve professional-looking results:
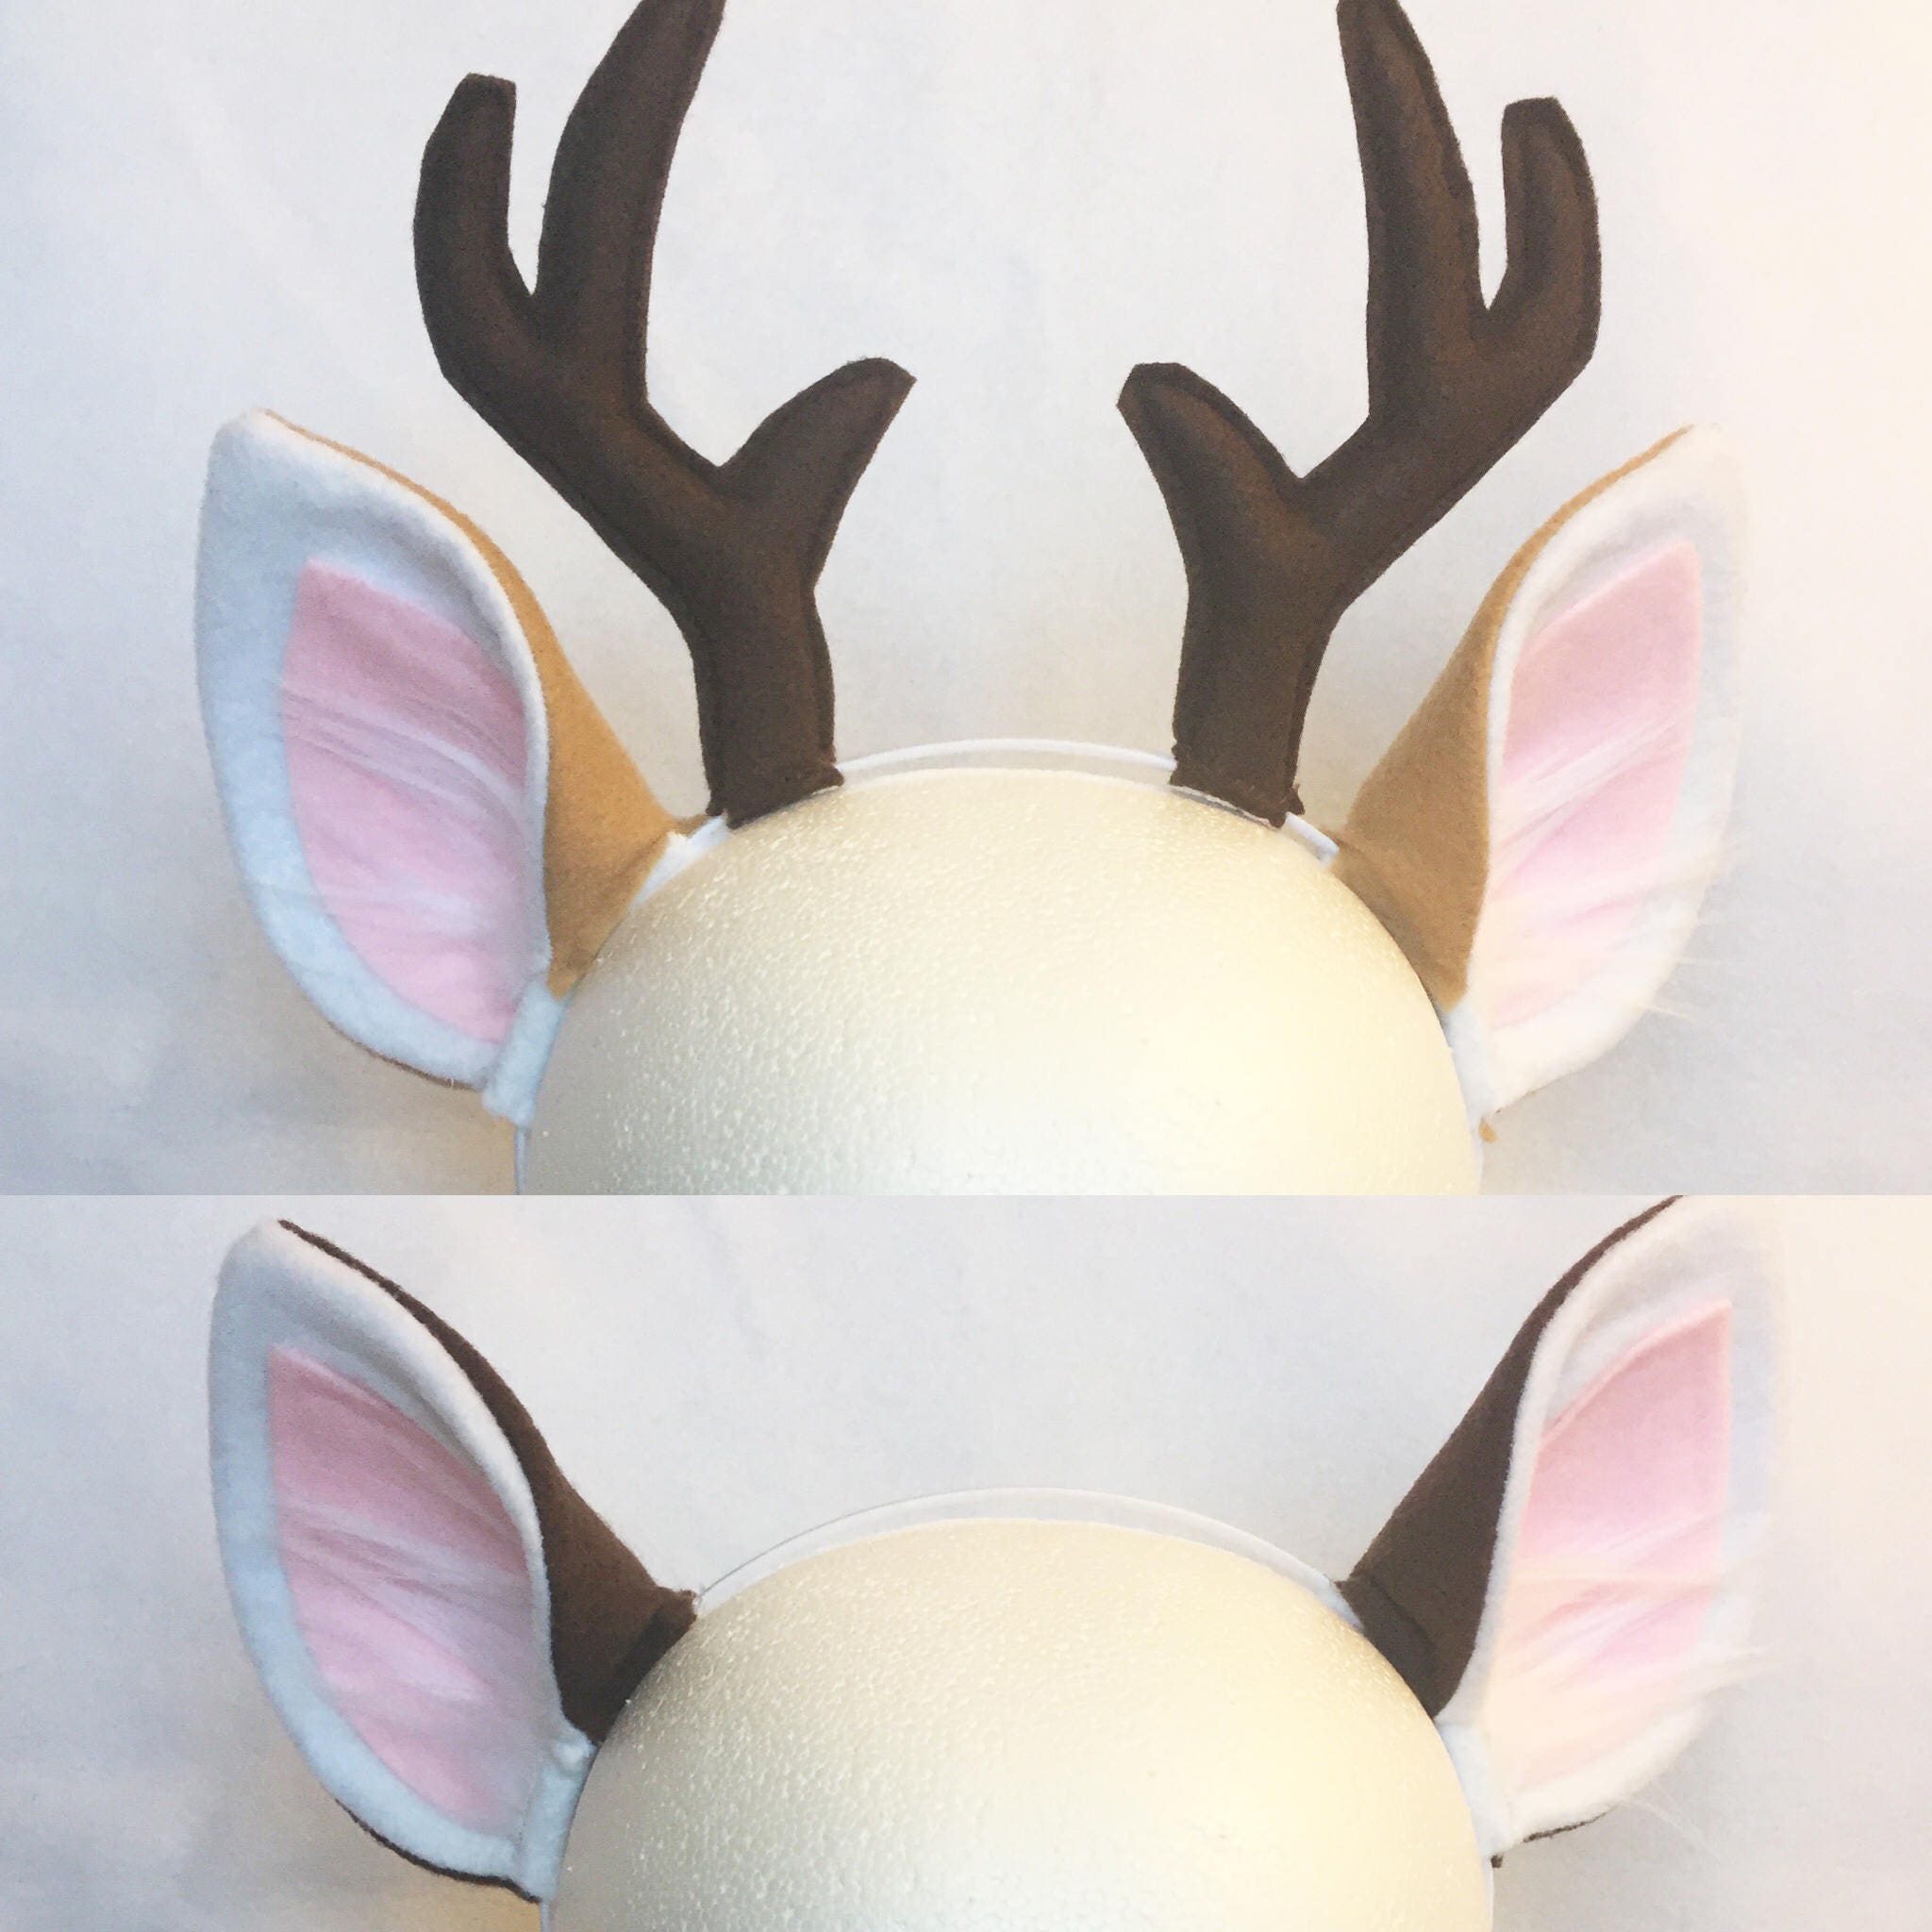
- Trace and Cut the Ear Shapes: Use a template or draw freehand to create two identical ear shapes on the foam or felt. Cut them out carefully using scissors or an exacto knife.
- Prepare the Headband: Measure and adjust the headband to fit comfortably around your head. If using a wig cap, ensure it is clean and free of tangles.
- Cover the Ears: Cut fabric pieces slightly larger than the foam shapes. Glue the fabric onto the foam, trimming any excess edges neatly.
- Attach the Ears to the Base: Position the ears on the headband or wig cap, ensuring they are evenly spaced and secure them with hot glue.
- Add Decorative Details: Use embroidery thread, fabric glue, or other embellishments to add texture and personality to your deer ears.
Throughout the process, take your time and pay attention to detail. Rushing through any step may result in uneven shapes or weak connections. Remember, practice makes perfect, so don't be discouraged if your first attempt isn't flawless. With each project, you'll refine your skills and improve the quality of your creations.
How Can You Customize Deer Ears for Different Looks?
One of the most exciting aspects of creating DIY deer ears is the ability to customize them to suit various styles and themes. For a classic woodland look, consider using earthy tones such as brown, beige, or green. To create a magical fairy-inspired design, incorporate shimmering fabrics, glitter, and pastel colors. Anime enthusiasts can experiment with vibrant hues and intricate patterns to bring their favorite characters to life.
Customization extends beyond color choices. You can also alter the shape and size of the ears to reflect different species or personalities. For example, smaller, rounded ears might evoke a playful bunny vibe, while larger, pointed ones could resemble majestic stag antlers. Adding faux fur, ribbons, or beads can further enhance the uniqueness of your deer ears, making them stand out in any crowd.
Common Mistakes to Avoid When Making DIY Deer Ears
Even experienced crafters encounter challenges when working on DIY projects. To ensure your deer ears turn out perfectly, be mindful of these common mistakes:
- Using Too Much Glue: Excessive adhesive can cause the fabric to warp or become stiff. Apply glue sparingly and evenly for optimal results.
- Ignoring Measurements: Failing to measure the headband or position the ears correctly may lead to an uncomfortable fit. Double-check all dimensions before attaching components.
- Skipping the Testing Phase: Always try on your deer ears before completing the final touches. This allows you to make adjustments and ensure comfort.
By being aware of these potential pitfalls, you can avoid them and create deer ears that look great and feel comfortable to wear.
What Are the Best Tips for Beginners?
If you're new to crafting or working with materials like foam and fabric, don't worry! Here are a few tips to help you get started:
- Start with simple designs and gradually work your way up to more complex projects.
- Watch tutorial videos or consult online guides for visual guidance and inspiration.
- Experiment with different materials to discover what works best for your style.
Remember, creativity is key! Don't be afraid to think outside the box and let your imagination guide you.
FAQs About DIY Deer Ears
Q: Can I use regular glue instead of a hot glue gun?
A: While possible, regular glue may take longer to dry and may not provide a strong enough bond for the components. A hot glue gun is recommended for quick and secure attachment.
Q: How long does it take to make a pair of deer ears?
A: The time required depends on your skill level and the complexity of the design. On average, beginners can complete a basic pair within 1-2 hours.
Q: Are DIY deer ears suitable for children?
A: Yes, with proper supervision and adjustments to size and materials, DIY deer ears can be a fun and safe accessory for kids.
Conclusion
Learning how to create DIY deer ears a stepbystep guide for cosplay and fun is an enriching experience that combines creativity, skill-building, and self-expression. By following the steps outlined in this article, you'll be able to craft stunning deer ears that complement any outfit. Remember to embrace the process, experiment with different techniques, and most importantly, have fun! Whether you're a seasoned crafter or a curious beginner, the world of DIY deer ears awaits your unique touch.
For more crafting inspiration and tips, check out reputable resources such as Instructables. Happy crafting!