Have you ever wanted to craft something meaningful and practical with your own hands? Creating a DIY shepherd’s staff is not only an enriching experience but also a way to connect with history, nature, and craftsmanship. A shepherd’s staff, often seen as a symbol of guidance and protection, has deep roots in various cultures and religions. Whether you’re looking to make one for personal use, as a gift, or simply to explore your creative side, this complete guide will walk you through every step of the process. From selecting materials to finishing touches, we’ll cover everything you need to know to bring your vision to life.
This project is perfect for anyone interested in woodworking, traditional crafts, or even spirituality. A shepherd’s staff can serve multiple purposes—whether it’s for walking support, decorative display, or symbolic representation. With the right tools, techniques, and patience, you’ll be able to create a staff that reflects your personality and style. Whether you’re a beginner or have some experience in crafting, this guide ensures that you’ll gain valuable insights to help you succeed.
Optimizing your skills and resources will make the process smoother and more enjoyable. You’ll learn how to select the best wood types, shape the staff, add custom designs, and finish it professionally. By following this guide, you’ll gain confidence in your abilities and end up with a beautiful, functional piece that you can cherish for years to come. Let’s dive into the world of crafting and discover how to create a DIY shepherd’s staff—a project that’s both rewarding and fulfilling!
Read also:251043000012358123941242621830202506530626628208091239224433123982750821490124343679912427
Table of Contents
- Introduction
- What Is the Historical Significance of a Shepherd’s Staff?
- Choosing the Right Materials for Your DIY Shepherd’s Staff
- Which Tools Do You Need to Craft a Shepherd’s Staff?
- How to Create a DIY Shepherd’s Staff: A Step-by-Step Guide
- Can You Customize the Design of Your Shepherd’s Staff?
- Tips for Adding a Professional Finish to Your Staff
- How Should You Care for and Maintain Your Shepherd’s Staff?
- Frequently Asked Questions
- Conclusion
What Is the Historical Significance of a Shepherd’s Staff?
Before we dive into the practical aspects of crafting a shepherd’s staff, it’s essential to understand its historical significance. The shepherd’s staff, also known as a crook or pastoral staff, has been used for centuries across different cultures and religions. In ancient times, shepherds relied on these tools to guide and protect their flocks, making them indispensable companions in daily life.
In biblical contexts, the shepherd’s staff symbolizes leadership, care, and guidance. It is often depicted in religious art and literature as a tool of authority wielded by figures such as Moses and Jesus. Beyond religion, the staff has also been associated with travelers, monks, and pilgrims who used it for support during long journeys. Its versatility and symbolic meaning make it a timeless object worth exploring further.
Understanding the history of the shepherd’s staff can inspire your design choices and help you appreciate the deeper meaning behind this craft. Whether you’re creating a staff for personal use or as part of a spiritual journey, knowing its roots will enhance your connection to the project.
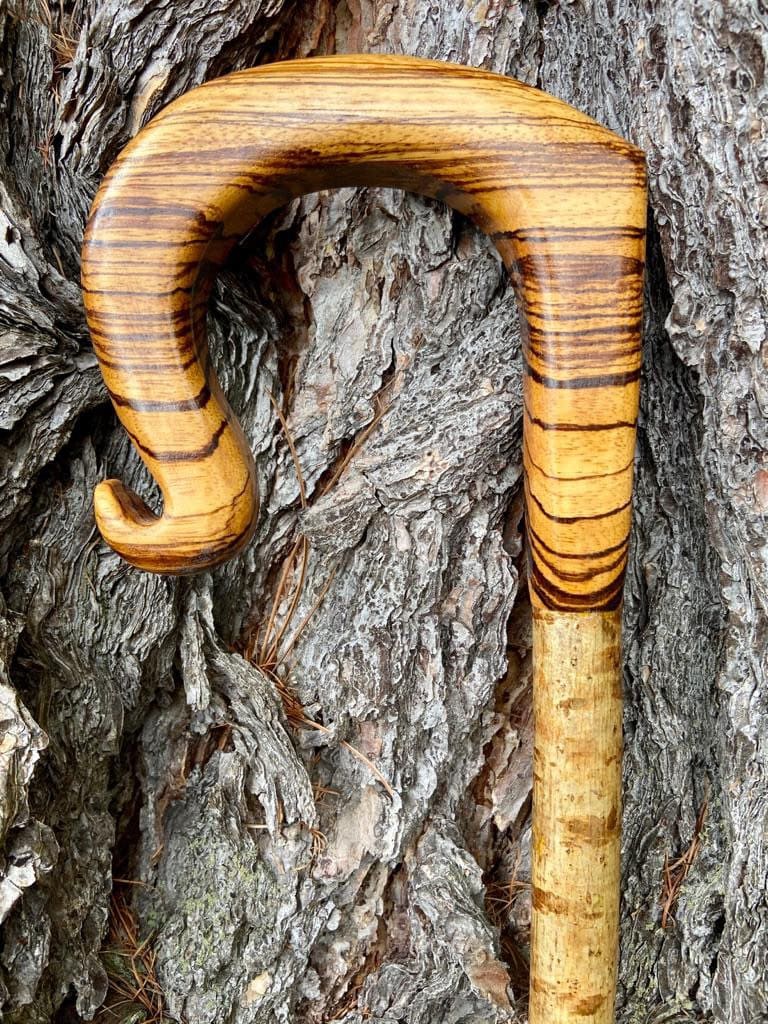
Choosing the Right Materials for Your DIY Shepherd’s Staff
Selecting the right materials is crucial when crafting a shepherd’s staff. The choice of wood will significantly impact the durability, weight, and appearance of your finished product. Popular options include hardwoods like oak, maple, and hickory, which are known for their strength and resistance to wear. Softwoods like pine and cedar, on the other hand, are lighter but may require additional reinforcement for longevity.
Consider factors such as climate, intended use, and personal preference when deciding on a material. For example, if you plan to use the staff outdoors frequently, a weather-resistant wood like teak might be ideal. If aesthetics are your priority, exotic woods with unique grain patterns could add a touch of elegance to your creation.
Read also:12471125311250312523123942998327963123983686127714653061245012483125031252312497124522421512398259132189232232385981236412418123831242512377124521253112473125001252412540124711251912531
Factors to Consider When Choosing Wood
- Strength and durability
- Weight and ease of handling
- Appearance and grain pattern
- Cost and availability
Once you’ve selected your wood, ensure it is properly dried and free from defects such as knots or cracks. This will help prevent issues during the crafting process and ensure your staff remains sturdy and reliable.
Which Tools Do You Need to Craft a Shepherd’s Staff?
Having the right tools at your disposal is key to successfully creating a DIY shepherd’s staff. Depending on your skill level and the complexity of your design, you may need a combination of hand tools and power tools. At a minimum, you’ll require a saw for cutting, a file or sandpaper for smoothing, and clamps for securing the wood while working.
For more advanced projects, consider investing in a lathe for shaping the staff’s handle or curve. A router can be useful for adding intricate designs or grooves to the surface. Don’t forget safety gear such as gloves, goggles, and a dust mask to protect yourself during the crafting process.
Essential Tools for Crafting a Shepherd’s Staff
- Saws (hand saw or circular saw)
- Files and sandpaper
- Clamps
- Lathe (optional)
- Router (optional)
Remember, the quality of your tools will directly influence the quality of your finished product. Investing in reliable equipment will save you time and effort in the long run.
How to Create a DIY Shepherd’s Staff: A Step-by-Step Guide
Now that you’ve gathered your materials and tools, it’s time to get started on crafting your shepherd’s staff. This step-by-step guide will walk you through the entire process, from preparation to completion.
Step 1: Prepare Your Workspace
Create a clean, well-lit workspace where you can comfortably work on your project. Ensure all necessary tools and materials are within reach to avoid interruptions.
Step 2: Cut the Wood to Size
Using a saw, cut your chosen wood to the desired length. A typical shepherd’s staff ranges from 6 to 8 feet, depending on your preference and intended use. Make sure the cuts are straight and even to maintain balance.
Step 3: Shape the Staff
With a file or sandpaper, smooth out any rough edges and shape the staff into a uniform cylindrical form. If using a lathe, this step becomes much easier and allows for precise shaping.
Step 4: Add the Hook or Curve
Create the iconic curved top of the staff using a router or by hand. This part requires careful attention to detail to ensure the curve is smooth and proportional to the rest of the staff.
Step 5: Finish the Staff
Sand the entire staff until it is smooth to the touch. Apply a finish of your choice, such as varnish or oil, to protect the wood and enhance its natural beauty.
Can You Customize the Design of Your Shepherd’s Staff?
Absolutely! One of the most exciting aspects of creating a DIY shepherd’s staff is the ability to personalize it according to your tastes and preferences. Whether you want to incorporate carvings, engravings, or decorative elements, the possibilities are endless.
Consider adding symbolic motifs such as crosses, stars, or floral patterns to reflect your spiritual or cultural beliefs. You could also experiment with different finishes, such as staining the wood in rich hues or applying a glossy coat for a polished look. If you’re feeling adventurous, try embedding small stones, beads, or metal accents into the staff for added flair.
Customization allows you to make your shepherd’s staff truly one-of-a-kind, expressing your creativity and individuality. Don’t be afraid to think outside the box and let your imagination guide you.
Popular Customization Ideas
- Carving symbolic designs
- Engraving names or dates
- Adding decorative accents
- Experimenting with finishes
Tips for Adding a Professional Finish to Your Staff
A well-finished shepherd’s staff not only looks better but also lasts longer. Proper finishing involves applying protective coatings that shield the wood from moisture, scratches, and UV damage. There are several options available, each offering unique benefits depending on your needs.
Varnish is a popular choice for its durability and shine, while oil finishes provide a natural, tactile feel. Wax coatings are great for enhancing the wood’s texture and can be easily reapplied as needed. Regardless of the finish you choose, ensure it complements the overall design and purpose of your staff.
Steps to Apply a Finish
- Clean the staff thoroughly to remove any dust or debris.
- Apply the finish evenly using a brush or cloth, following the manufacturer’s instructions.
- Allow the finish to dry completely before handling or using the staff.
By taking the time to apply a quality finish, you’ll ensure your shepherd’s staff remains beautiful and functional for years to come.
How Should You Care for and Maintain Your Shepherd’s Staff?
Maintaining your shepherd’s staff is essential to preserving its appearance and functionality. Regular care will prevent wear and tear, keeping your staff looking as good as new. Here are some tips to help you keep your staff in top condition:
Cleaning and Storage
- Wipe the staff with a soft cloth to remove dust and dirt.
- Store it in a dry, cool place to avoid exposure to extreme temperatures or humidity.
Reapplication of Finish
- Periodically reapply the finish to maintain protection and shine.
- Inspect the staff regularly for signs of damage or wear.
With proper care, your shepherd’s staff will remain a cherished possession for many years.
Frequently Asked Questions
How Long Does It Take to Create a DIY Shepherd’s Staff?
The time required to craft a shepherd’s staff varies depending on the complexity of the design and your skill level. Beginners may take several days to complete the project, while experienced crafters can finish it in a few hours.
Can I Use Recycled Wood for My Shepherd’s Staff?
Yes, recycled wood can be an excellent choice for crafting a shepherd’s staff. It adds character and sustainability to your project, provided the wood is in good condition and free from harmful chemicals.
Conclusion
Crafting a DIY shepherd’s staff is a rewarding endeavor that combines creativity, skill, and tradition. By following this complete guide, you’ve gained the knowledge and confidence needed to create a staff that reflects your personal style and values. Whether you’re using it for practical purposes or as a symbol of faith, your shepherd’s staff will serve as a testament to your craftsmanship and dedication.
Remember, practice makes perfect. Don’t be discouraged if your first attempt doesn’t meet your expectations—every project is an opportunity to learn and grow. Embrace the process and enjoy the satisfaction of creating something meaningful with your own hands. Happy crafting!
For more inspiration and tips, check out this woodworking magazine for additional resources.
![How To Make A Shepherd's Staff Sling [Part 1] The Staff YouTube](https://i.ytimg.com/vi/6iWxOKd9lG4/maxresdefault.jpg)